Category Archives: Life skills

Blue Lion Cub

I’m the proud owner of an actual car, and it’s a doll!  The tiny Peugeot 107 but it’s just right for me, Antonia, and the picnic basket.  Also it’s a pretty blue colour and has a CD player, so we are both very happy.  It came a couple of months earlier than expected, causing an unexpected cash flow situation.  On the other hand I came back from the UK to find we were still a one car family so its arrival really eases that strain.  No more choosing between being a prisoner at home or tagging along on major driving around sessions where everyone tries to get all their conflicting activities done!  This car is tiny, relatively green and cheap to run, and drives very nicely so far. Many people have this suspicion that since we live on a mountain we need a big, powerful car. This is not quite true.  These little city cars are strong on the lower gears with less power in 4th and 5th.  To drive on hills you mostly need the lower gears (to American readers:  the car is a stick shift, like 99 percent of cars driven in Europe). Also the car is very light.  What with one thing and another, it climbs at the same speed and in the same gear as our SUV.  Mike thinks it will fare badly in the snow, but I think it will only be grounded on the four or five days a year when it is actually snowing.

Now I am thinking that with all the excitement of having a new car, and because it is a very simple car, now is a fine time to teach Antonia some basic car mechanics and maintenance.
Homeschooling Dad

the-cooks.jpg

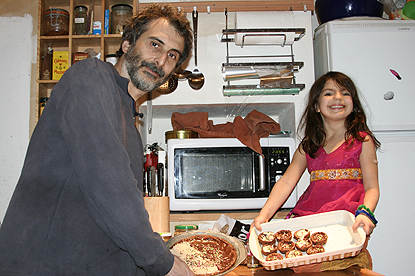
I left Mike in charge of homeschooling this afternoon, due to mushy brain syndrome.  In fact I also did that yesterday afternoon, due to weekly shopping and fever on Antonia’s side.  Mike’s less adaptable than I am about the activities he will undertake.  So far, Antonia and he have mainly shared an interest in board games.  Looks like they have a few new possibilities: playing in the snow, learning to write Japanese characters, building things out of the recycling trash, and BAKING.  I’m rooting for the baking!

Candy-making for beginners

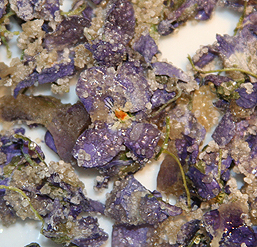
 Antonia and I are planning to learn to make sweets of all kinds.  And we will be calling it chemistry.  We started with crystallised violets, which can only be done at this time of year of course.

crystallised-violets.jpg

Crystallised violets are very retro.  I suppose we must be in that kind of mood.  By the time I was a kid they had already morphed into artificial purple blobs.  Now they’ve disappeared completely, presumably because the purple food colouring turned out to be carcinogenic.  I can see why the real ones aren’t mass marketed.  If we want to improve them next time, we will paint each one with egg white individually using a small paintbrush, as the recipe suggests, instead of just dunking them.  And I would go with the ultra-refined, pure white, finely crystallised sugar instead of the earthy, organic stuff we usually use.

We also made fudge, but as we didn’t have a sugar thermometer at the time we undercooked it.  The mixture sat around the kitchen for, errrm…, several weeks while it dried to a suitable consistency.  Now it tastes just right.

fudge.jpg

We are fairly expert at origami by now, so making the box to keep the sweets in was a singe.  I love making boxes, plates, envelopes and folders, which must be one of the most useful and easy branches of origami.

Making a multi-tiered decorated cake for kids

antonias-amazing-cake-tn.jpg

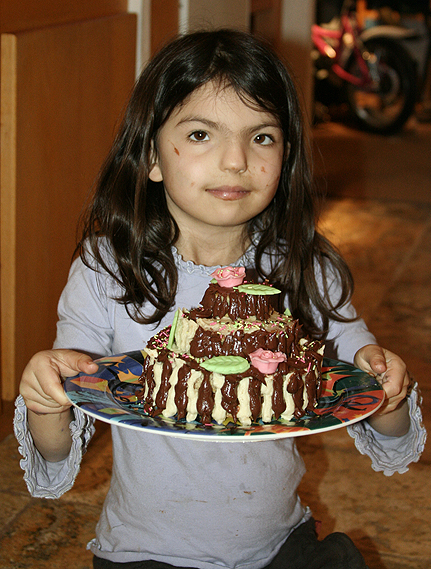
Antonia’s dream cake looks amazing but it was actually quite easy to make. She’s been on to us to help her make a cake like this for over a year. I can’t believe it took us that long to get round to it and figure out a workable procedure.

Make the tiers

  1. Buy one or more plain cakes from a shop – or make them if you prefer
  2. Make a large, medium and small circle template out of paper and make sure you like the relative proportions and that they fit on your cake
  3. Cut out the circles with a knife and stack them
  4. (optional) we made a double layer for the first tier. We didn’t have enough cake to make the full circle so we cut out two halves from the left over cake, put them together, and filled in any gaps with bits of cake. It worked fine.Make the icing
  5. Make a large batch of icing. To do this, we just whipped up some butter in the mixer, added icing sugar till it tasted right, then a tiny bit of cream to adjust the consistency.
  6. Separate the icing into two or more bowls and add colour/flavour. We stirred vanilla essence into one bowl and melted chocolate into the other. The chocolate icing was too runny at first, but it soon reached the right consistency in the fridge.Decorate the cake
  7. Apply icing to cake as desired. Antonia used a butter knife to apply icing to the top surfaces. Then she used a piping syringe to pipe icing up the sides. She did the white stripes first, leaving a gap for the chocolate ones. In some places, she did all white or all chocolate. After one demonstration, she could do it by herself. The difficulty comes when you want to change colours. The ideal for children would be to have one piping syringe per colour of icing. Otherwise, and adult may need to help with the cleaning.
  8. Apply bought decorations of choice to cake, or candles or any decorations made at home.Last but not least
  9. Eat… but leaving it in the fridge for a few hours hardened up the icing a bit and made it even better.